|
Spearit NTR Inserts: Wishbone Assembly
- Cut the ends of a 12in(30cm) piece of wishbone cord at an angle for easier insertion. We recommend Spearit 1.9mm or 2.5mm Spectra wishbone cord.
.
- Thread two NTR Terminal Inserts on to the cord, butt first, from opposite ends.
Figure 2
.
- Tie a simple over hand knot in one end of the cord
Figure 3 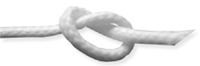
.
- Postion and tighten the knot 1/2in(13mm) from the end of the cord.
Figure 4 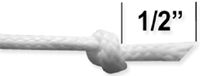
.
- Tie a second overhand knot in the opposite end of the cord.
.
- Position and tighten this knot 3 inches (for 4.5 inch wishbone) from the first.
Figure 6
.
- Trim the excess cord 1/2in(13mm) from the second knot.
.
- Unravel the strands of the 1/2in(13mm) tails at both ends of the cord.
Figure 8 
.
- Melt the unraveled strands with a heat gun and roll them into a tight ball against the knots. It is highly recommended that this step be performed only in a well ventilated outdoor area using protective leather gloves.
Figure 9 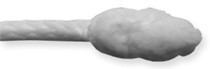
.
- Seat the end knots in the knot chambers of the NTR Inserts.
Figure 10 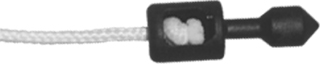
.
Spearit NTR Inserts: Wishbone Installation
- Generously lubricate the Spearit NTR Wishbone Inserts with liquid hand soap or silicone lubricant.
.
- Insert the terminal of the Wishbone Inserts into the ends of the latex band tubing.
Figure 2 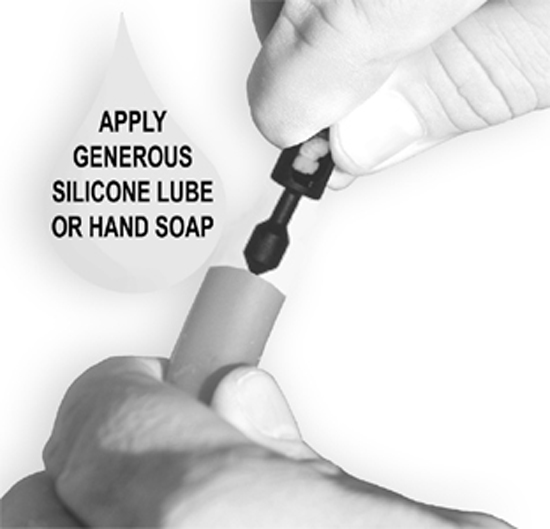
.
- Using your thumb, press the Wishbone Inserts into the tubing until the knot chamber is is against the
end of the tubing.
Figure 3 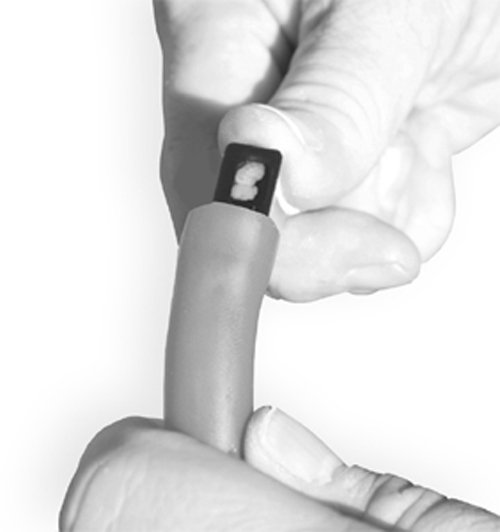
.
- Position and tighten a constrictor or double constrictor knot 3/8in(9mm) from both ends of the tubing.
Figure 4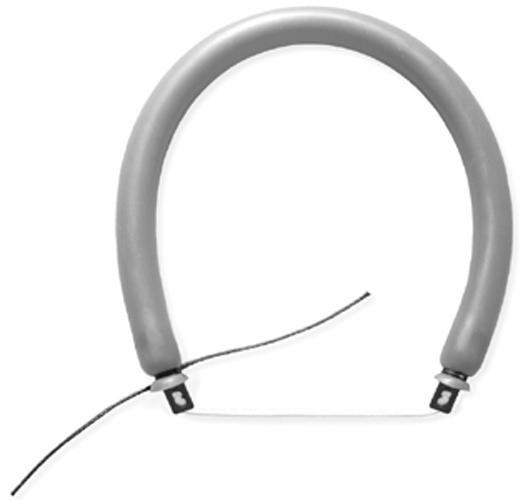
|
